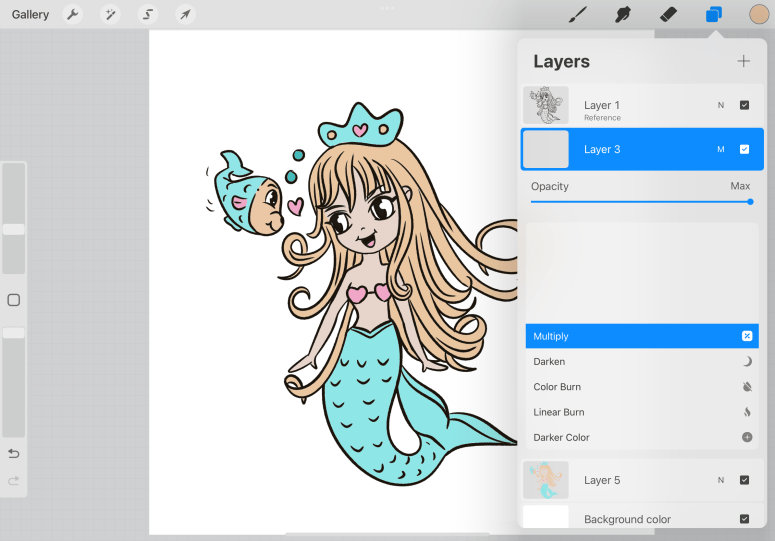
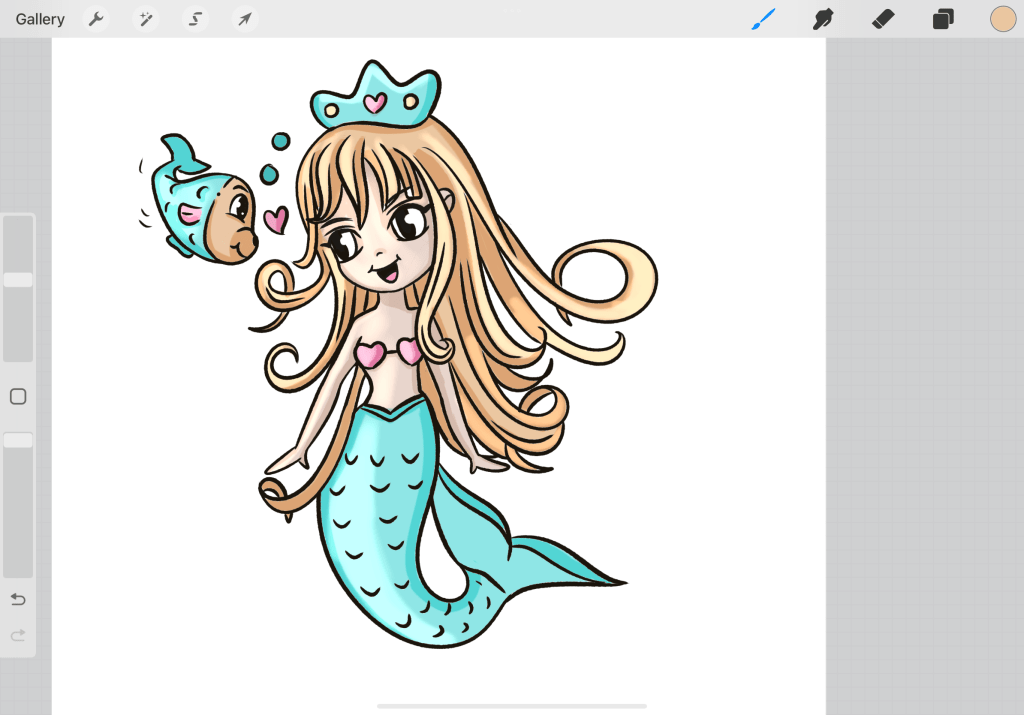
During our first tutorial we learned how to reference a layer, color beneath it, drag and drop color a color, and find matching combinations using the color classic view. Now we are ready to create shadows, shadows that create dimension.
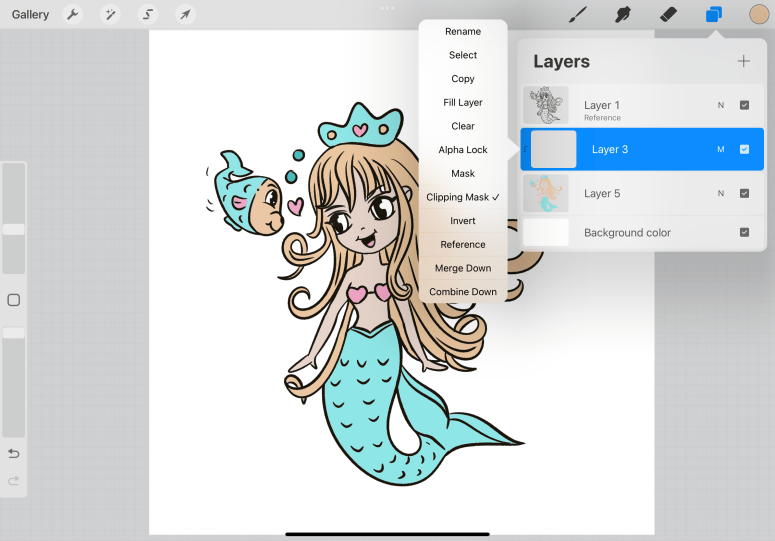
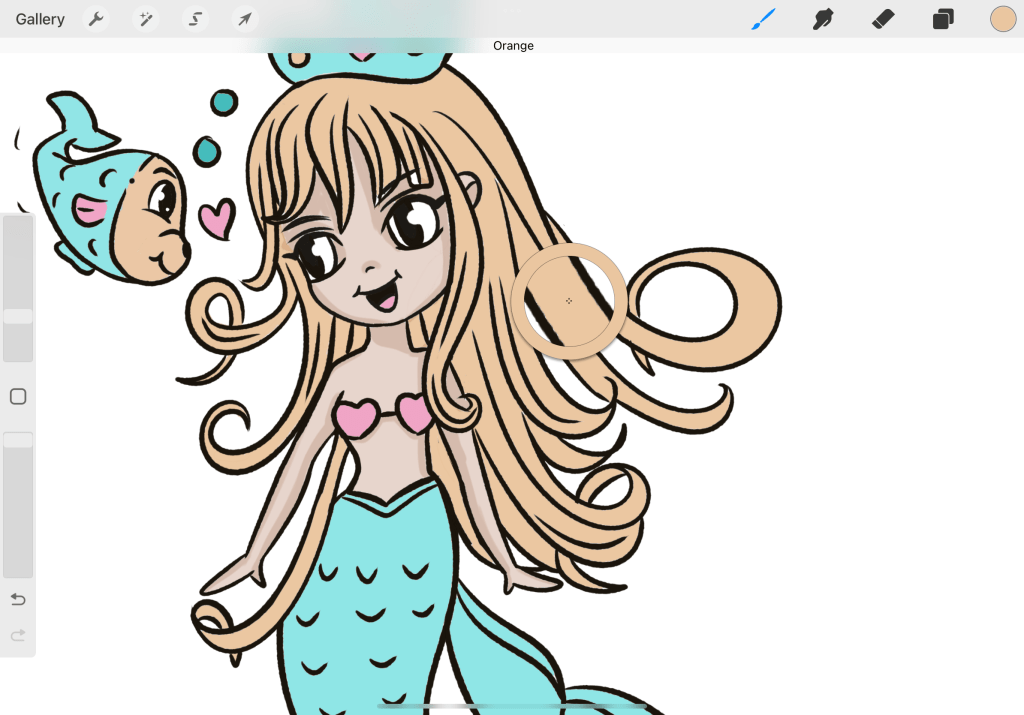
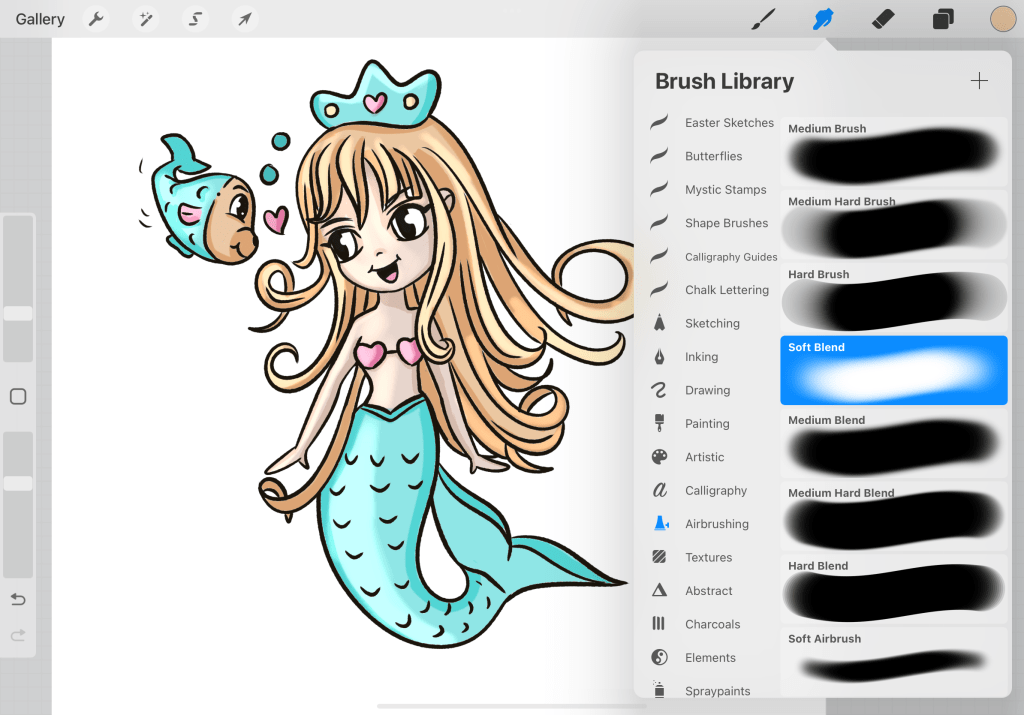
To do so we will create a new layer just on top of the color layer and set it to multiply. Since we want the shadows to effect only the color area we are going to use the clipping mask feature.

You can use the Airbrushes available for free from the Standard Procreate Brushes. I recommend using either the Medium or the Soft Airbrush since we are going for a more dimensional result.
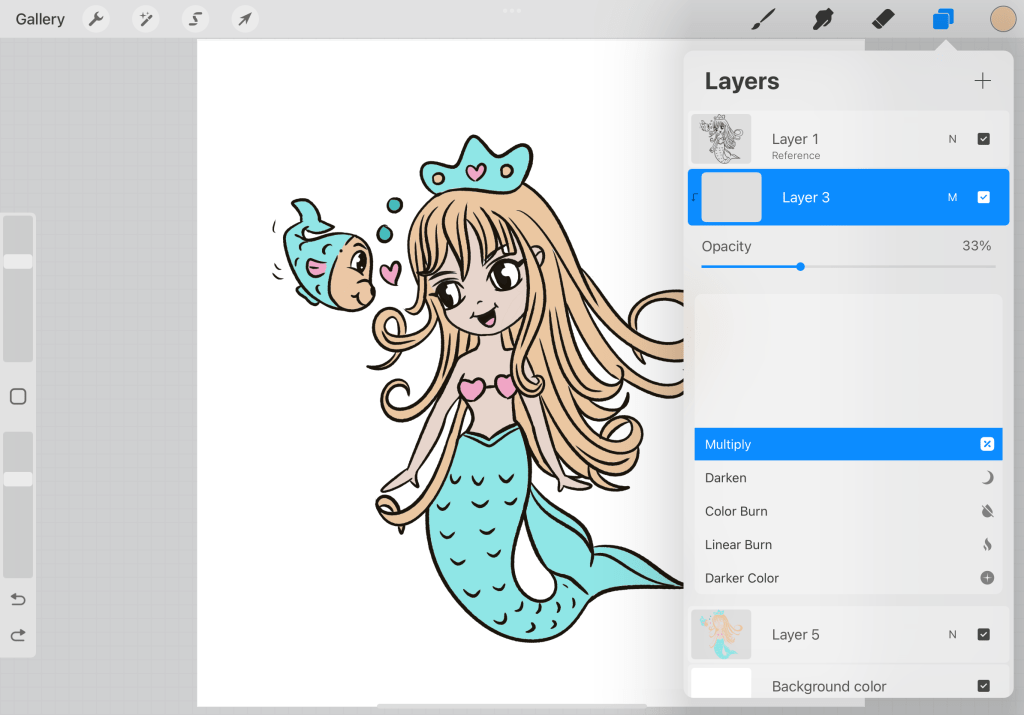
Then you can go and test the opacity of the brush until you get a semi-transparent effect. Usually an opacity between 20 to 35 percent will do, depending on how dark the selected color for the shadow is.
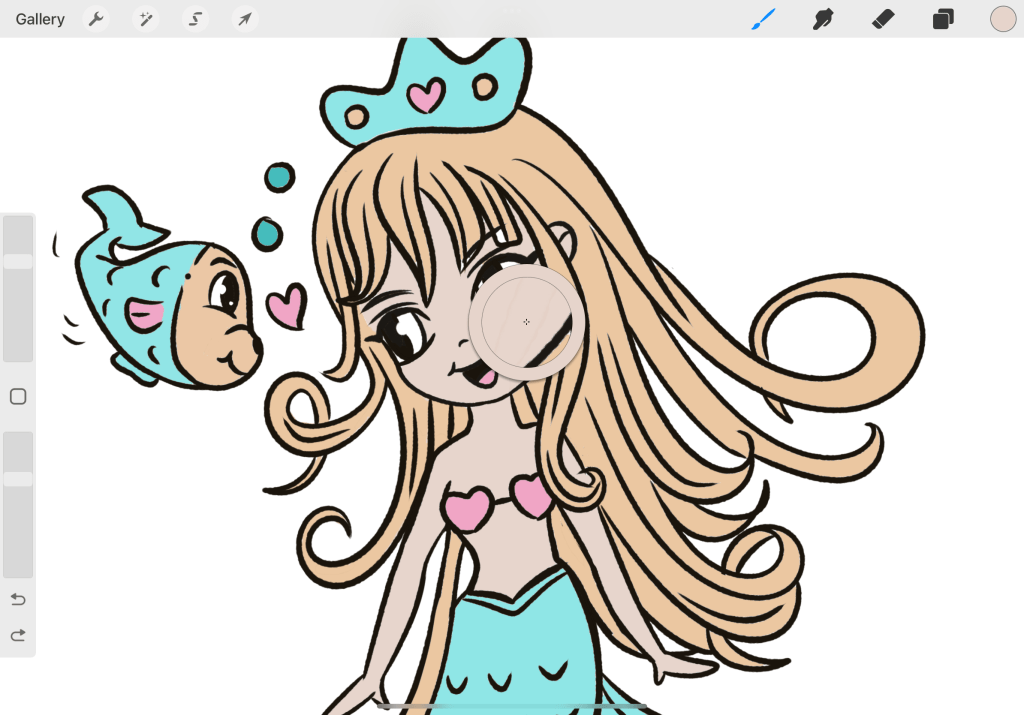
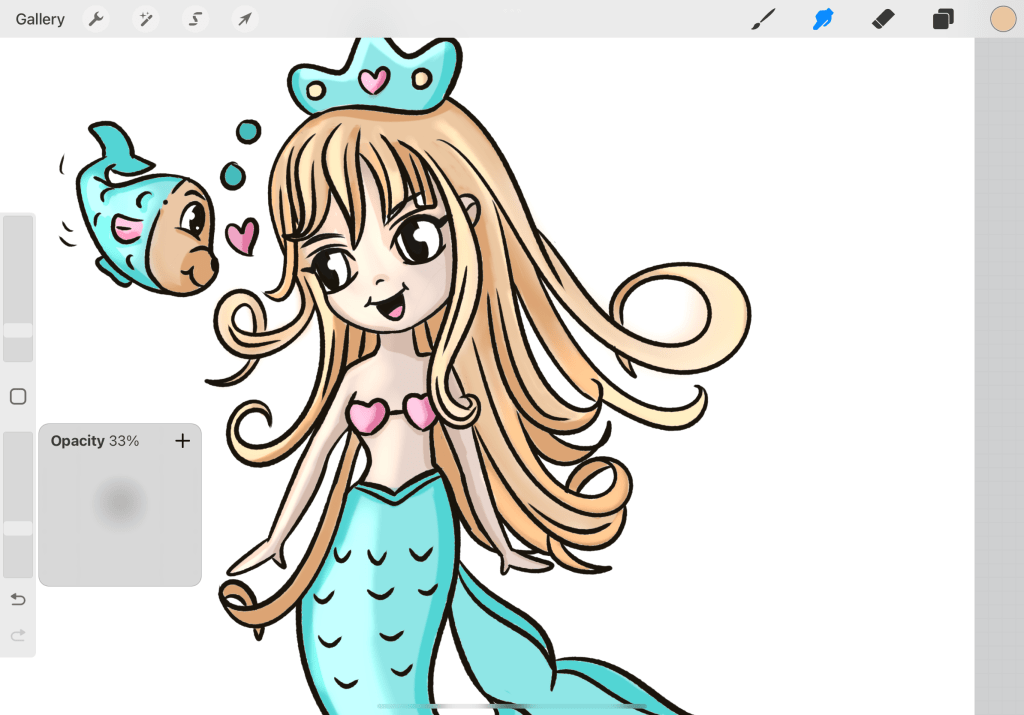
Start by color picking the skin color. Paint the areas which are naturally always a bit darker such as the forehead, the neck area and the inside of the arms. Once we finish this color pick the next color which is the hair color. Since we have this color we are also going to apply shadow to our fish face. Going color by color helps us save time instead of doing color changes all the time. Even though its not necessary to go this way, it’s quite practical.
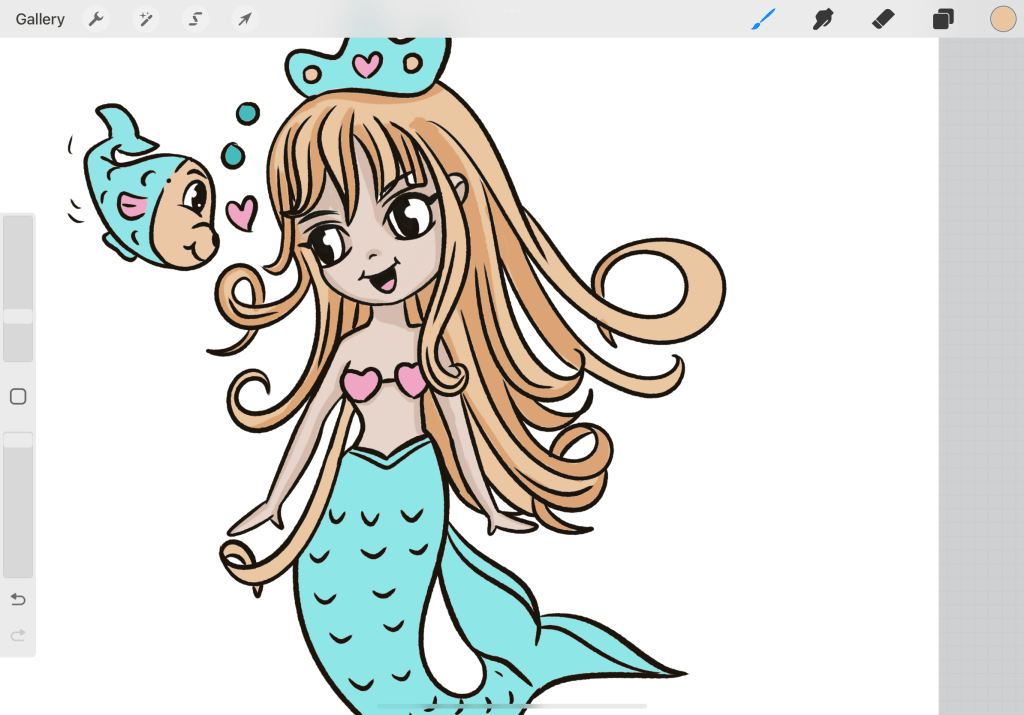
Apply the shadow in the areas behind the head and back and also at the half bottom of the several strands so they are distinguishable from each other. We continue with the next color to do the tale and the body of the fish.

As you can see above we applied shadows to the fish tale, to the body of the fish and to the crown.
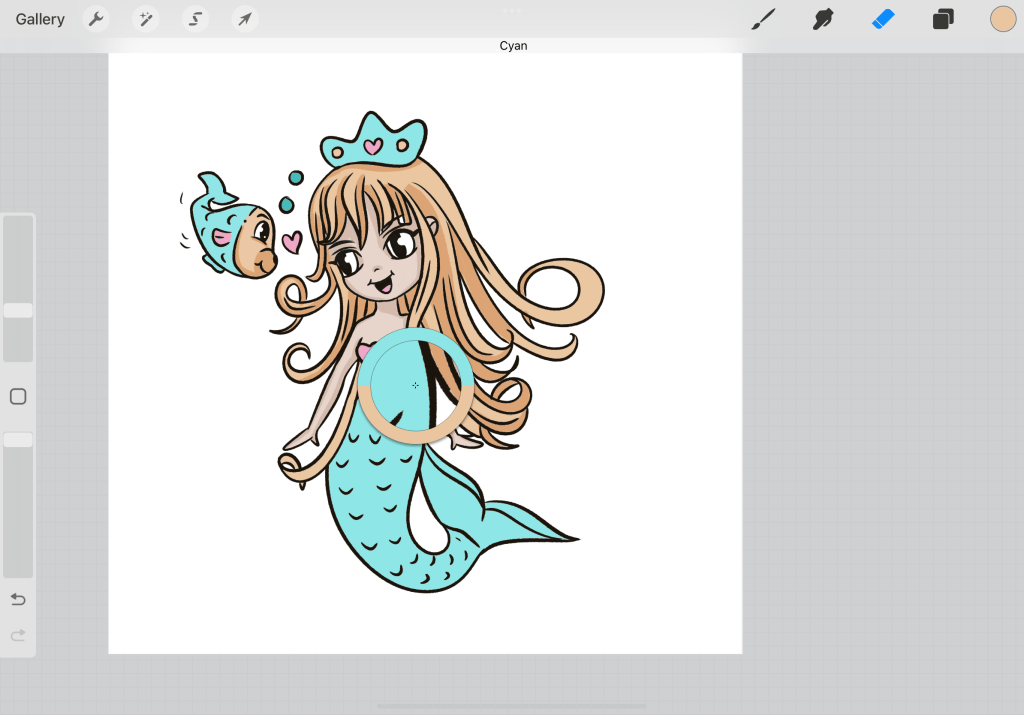
Since we are done with the shadows, we are going to create highlights. So again we will create a clipping mask layer on top of our shadow layer and set it to Add blend mode. Add is a very strong light mode so you will need to reduce the opacity at around 20 with with 25%. Pick a light color such as the base skin color and this will be enough to add highlights to the whole design.
With highlights the necessity to have a light source becomes more eminent. Since we don’t have a set environment, we will simply go with the angle which is more flattering for the character. So we will add the highlights at the front as if the light comes from the left side.

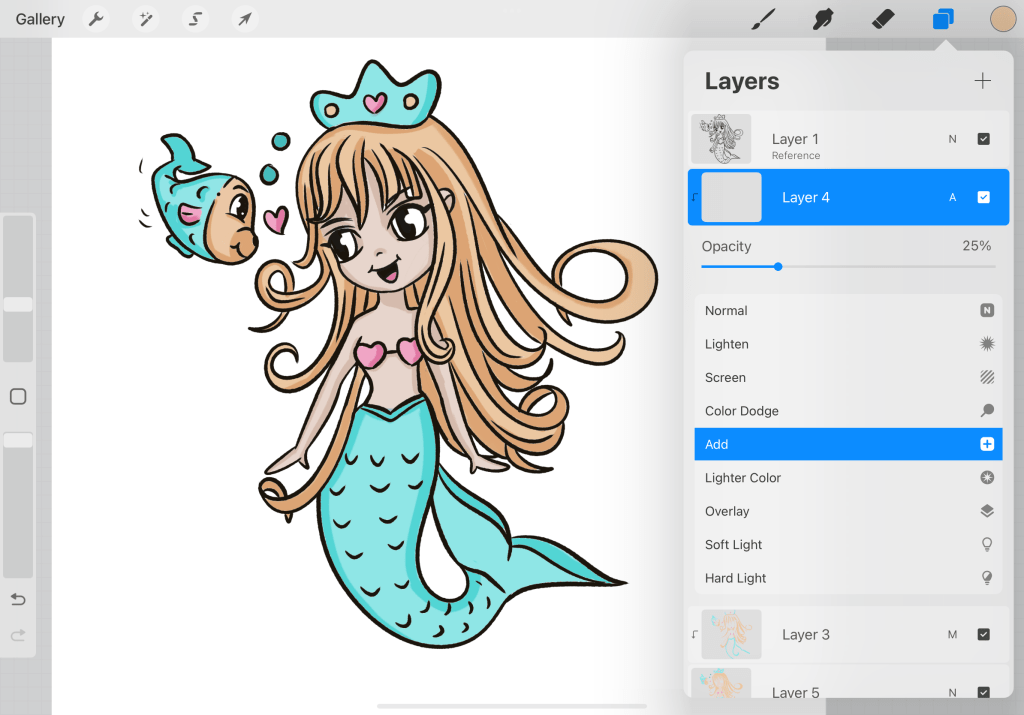
Once we apply the highlights our design may look more harsh since we have more contrast between dark and light areas. At our final step we are going to smooth both the shadows and the highlights.
To achieve this we are going to switch to the smudge tool and from the air brushing we are going to choose the soft blend brush.
You may need to lower the opacity of the brush since we want the smudge effect to be soft but not to vanish all the contrast between darkness and light.

Using the smudge tool try to soften all the harsh lines going between the shadow and the add layer in order to create smoother transactions between the two. Since this is a basic color I am going to stop here. Shadows and highlights are a great chapter in coloring but for small sketches is better to keep it simple. Our character as you can see has more dimension than shadows and therefore another layer of shadows would be needed this time using a single shadow color to set the mood. But as I said let’s keep it short and sweet.
Thank you for reading and I hope I have helped you in basic coloring at procreate.
